

Because a system image includes your personal data and can be used to fully recover a damaged system, it’s recommended that you do create a System Image of your computer periodically as part of your backup plan. And here is how you can do it in both Windows 8.1 and Windows 10.
Create a standalone System Image
Open Control Panel, and go to System and Security, then File History. Click on System Image Backup under See also section at the bottom left corner.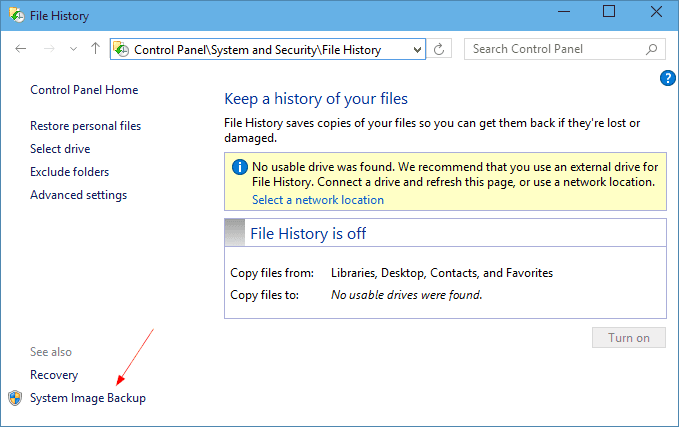
The Create a System Image utility opens, waiting for you to pick a suitable storage place to save the image file. A second or external USB hard drive with large capacity is much preferred. You can’t save a System Image in the same drive that you are backing up.
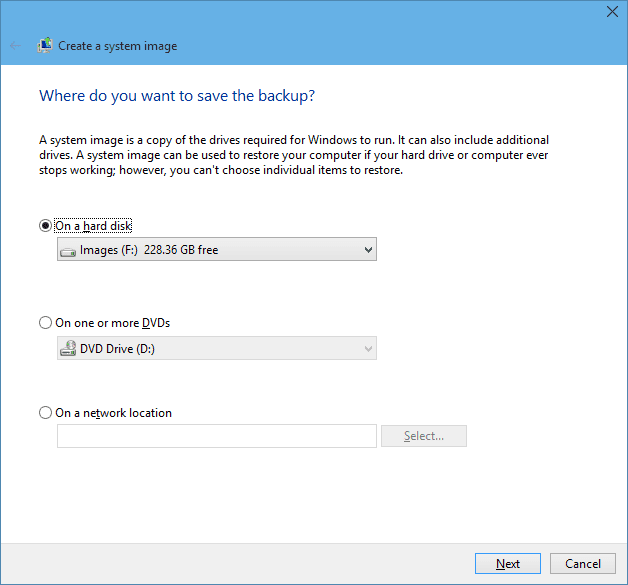
Click Next when ready, and confirm the setting next window before clicking on Start backup.

Depending on how big the drives are, it could take some time to have the image created. The image file will be saved under WindowsImageBackup folder in the drive you selected earlier.
Restore a System Image
Here is how you can use a previous saved System Image to revert your computer back to a previous state when your computer is still working.Open Control Panel, and go to Recovery, then Open System Restore,

Click Next, and check the option “Show more restore points” to show the System Image created before.

You can use the button Scan for affected programs to find out what will happen if you go with the selected Restore Point. When all set, go to Next.

Click Finish and let Windows to the rest for you. The computer will restart itself when it’s done.
Restore a System Image when my computer cannot boot anymore
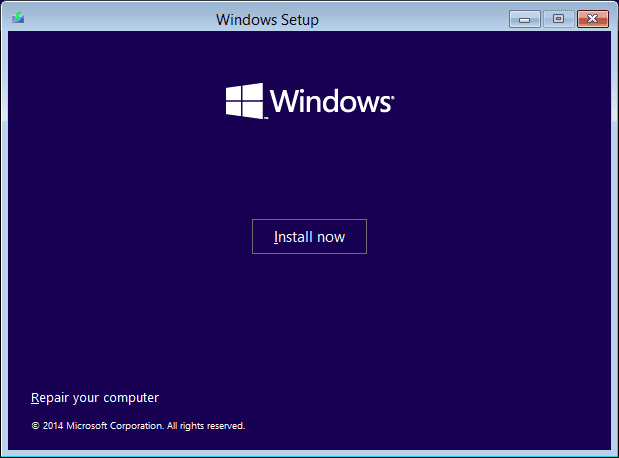
What if my computer got crashed and cannot boot to Windows anymore? Well, here is what you can do.Boot to Windows 8.1 or Windows 10 installation media. When you get to the screen like below, click Repair your computer instead of Install Now.
It takes you straight to the Advanced Startup menu, like below:
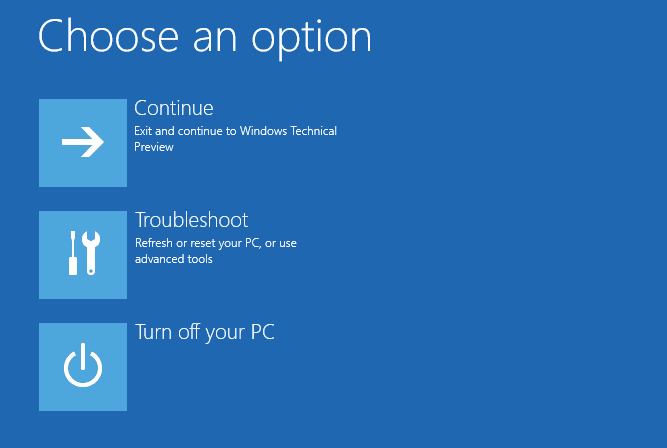
Select Troubleshoot,

Then Advanced options,

Then, select System Image Recovery option. The computer boots into Re-image your computer.
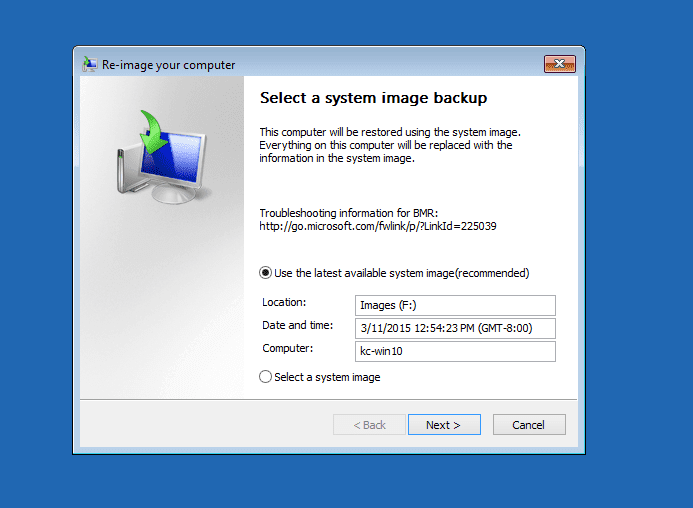
Follow through the wizard, select the right restore point, and off you go.


